Quick Start
Features
This project is to be served as a basis for a fully fledged web application, it is constantly evolving, and more are being added every month. As with any project, nothing is perfect, I made this in my spare time and while I have used it for many people, there will always be bugs. If you find a bug please make an issue, also please refrain from making issues that are specific to your project and not the boilerplate. I hope you enjoy all of the hard work I have put into this, I plan on keeping it updated but I will definitely need help if anyone is available to research issues and make pull requests to fix them. Also, don't be insulted if I refactor your code after a pull request, I like to stay organized and keep the flow of the source uniform.
- Admin Template
- File Manager
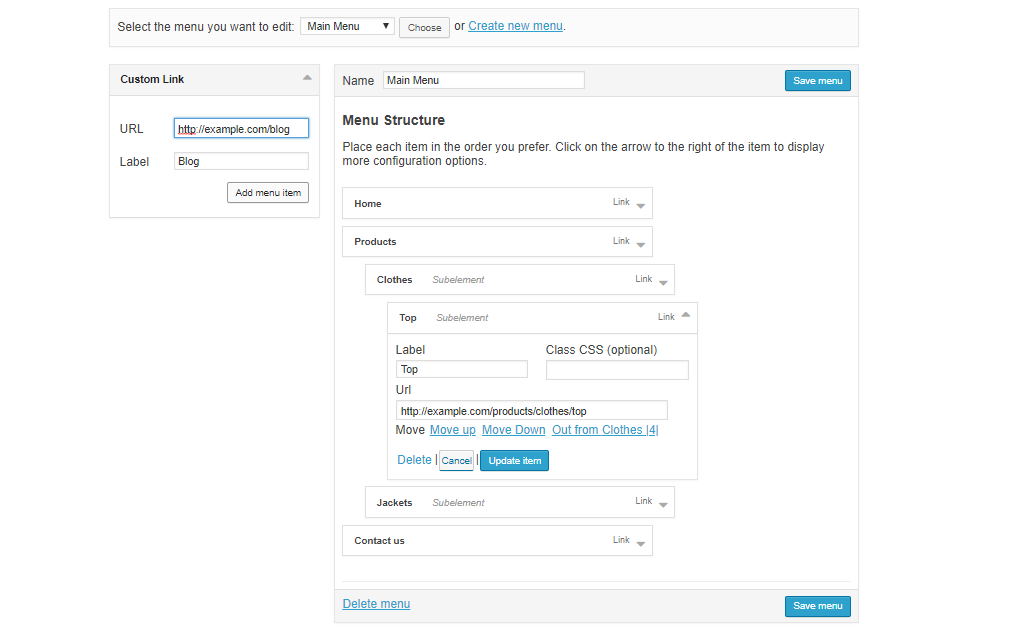
- Menu Manager
-
Image Manipulation
to implement image manipulation use url params, ie http://localhost/webcore/public/img/{path}?{param=value}
default {path} is configured relative to public_path,
see .env for FILESYSTEM_DRIVER and config/filesystems.php
please check Glide documentation for manual guide -
Laravel Generator based on Infyom Laravel Generator with Additional features:
- Date Time Picker (htmltype = date-picker, time-picker or datetime-picker)
- Select2 (all select input will be select2, for multiple use htmltype = multi-select)
- Two side Multiple Select (htmltype = two-side-select)
- HTML Text Editor (htmltype = text-editor)
- File Manager (htmltype = file-manager or files-manager)
- Nullable field in migration (console option = n, or in json file using dbNullable = true)
- Logged fields : created_by and updated_by (console option = --logs)
- Related Dropdown (in console, use --relations option) : add view model in controller, and relational input form in view (htmltype = select,relation:{view-model}={field-to-show}={field-as-value})
- Related Form (in console, use --relations option) : add view model in controller, and relational input form in view (dbtype = table and htmltype = related-form,related-field1,related-field2,related-field3,...)
- Component and theme reader generator (htmltype = select,component or select,theme)
- Model reader generator (htmltype = select,model)
-
Front Page System (support themes, template position and view components)
Code Sample can be download in https://github.com/dandisy/themes -
Reusable Component
-
Using Webcore Component Presentation System for Font Page Component
Code Sample can be download in https://github.com/dandisy/themes -
Using Widget (Widget Class & Widget View) using arrilot/laravel-widgets for UI Component
as much as possible the widget should have a loose coupled, bring data on the fly, avoid directly include / use in widget class
webcore include a widget, with this you able to use shortcode on Page description field to get datasource from models, use syntax :
[source=ModelName,where=any_field_name:value,position:any_theme_position,widget=any_widget_view] -
Using Laravel Package
webcore include webcore-microsite package as code sample for basic package
-
Using Webcore Component Presentation System for Font Page Component
-
Pre Configured Oauth using Laravel Passport
with Elorest as Laravel eloquent RESTAPI package see https://github.com/dandisy/elorest-
to login use http://localhost/webcore/public/oauth/token
with params :
- client_id
- client_secret
- grant_type
- username
- password
- scope
-
to get resources example http://localhost/webcore/public/api/product
with header Authorization = Bearer {your-token}
-
to login use http://localhost/webcore/public/oauth/token
Screenshots

Download
Installation
1. Download
Download the files above and place on your server.
Or if you using git, clone github repository to your server, by run this command
git clone https://github.com/dandisy/webcore.git
Or using composer can skip some laravel setup project (recommendated)
composer create-project dandisy/webcore {your-project-name}
2. Environment Files
This package ships with a .env.example file in the root of the project.
You must rename this file to just .env
Note: Make sure you have hidden files shown on your system.
3. Composer
Laravel project dependencies are managed through the PHP Composer tool. The first step is to install the depencencies by navigating into your project in terminal and typing this command:
composer install
4. Create Database
You must create your database on your server and on your .env file update the following lines:
                                                DB_CONNECTION=mysql

                                                DB_HOST=127.0.0.1

                                                DB_PORT=3306

                                                DB_DATABASE=webcore

                                                DB_USERNAME=non_root

                                                DB_PASSWORD=secret
Change these lines to reflect your new database settings.
5. Artisan Commands
The first thing we are going to so is set the key that Laravel will use when doing encryption.
php artisan key:generate
You should see a green message stating your key was successfully generated. As well as you should see the APP_KEY variable in your .env file reflected.
It's time to see if your database credentials are correct.
We are going to run the built in migrations to create the database tables:
php artisan migrate
You should see a message for each table migrated, if you don't and see errors, than your credentials are most likely not correct.
We are now going to set the administrator account information. To do this you need to navigate to this file and change the name/email/password of the Administrator account.
You can delete the other dummy users, but do not delete the administrator account or you will not be able to access the backend.
Now seed the database with:
php artisan db:seed
You should get a message for each file seeded, you should see the information in your database tables.
Then create storage symbolic link with:
php artisan storage:link
6. Laravel Passport (OPTIONAL)
If you want to activate oauth, edit the uri oauth in vue files in
resources/assets/js/components/passport, then run this artisan command
php artisan passport:keys
In order to install the Javascript packages for frontend development, you will need the Node Package Manager, and optionally the Yarn Package Manager by Facebook (Recommended)
If you only have NPM installed you have to run this command from the root of the project:
npm install
If you have Yarn installed, run this instead from the root of the project:
yarn
then,
npm run dev
Now you can access oauth admin panel, to manage your oauth client in
http://localhost/webcore/public/oauth-admin
7. Login
After your project is installed and you can access it in a browser, click the login button on the right of the navigation bar.
The default credentials are:
Username: superadministrator@app.com / adminstrator@app.com / user@app.com
Password: password
You will be automatically redirected to the backend. If you changed these values in the seeder prior, then obviously use the ones you updated to.
Usage
1. As Laravel Admin Panel
To generate laravel code interactively
php artisan generate:api_scaffold {YourModelName} --datatables=true
or if you already have model schema json file
php artisan generate:api_scaffold {YourModelName} --fieldsFile=YourModelName.json --datatables=true
2. As Laravel Web CMS
Run these command in your console
php artisan generate:api_scaffold Page --fieldsFile=Page.json --datatables=true --prefix=admin --logs
php artisan generate:api_scaffold Post --fieldsFile=Post.json --datatables=true --prefix=admin --logs
Then
composer require dandisy/webcore-page:dev-master
php artisan vendor:publish --provider="Webcore\Page\PageServiceProvider" --tag=config
If you want Webcore Front Page System themes & components code sample
download in https://github.com/dandisy/themes (don't clone)
then extract to your project root directory
see https://github.com/dandisy/webcore-page for more info
then run
composer require dandisy/webcore-menu:dev-master
php artisan vendor:publish --provider="Harimayco\Menu\MenuServiceProvider"
php artisan vendor:publish --provider="Webcore\Menu\MenuServiceProvider" --tag=models
php artisan migrate
see "https://github.com/dandisy/webcore-menu for more info
3. Laravel Web CMS with Webcore Front Page System
Webcore front page system implement component based front page,
to use component, you must define data source of component,
then place the component to any template position in page presentation.
For preparing webcore front page system, run these artisan commands
If you already generate Page, run this
php artisan generate:api_scaffold Page --fieldsFile=webcore/Page.json --datatables=true --prefix=admin --skip=migration,routes,menu --logs
Otherwise, run this
php artisan generate:api_scaffold Page --fieldsFile=webcore/Page.json --datatables=true --prefix=admin --logs
then,
php artisan generate:api_scaffold Presentation --fieldsFile=Presentation.json --datatables=true --prefix=admin --logs
php artisan generate:api_scaffold Component --fieldsFile=Component.json --datatables=true --prefix=admin --logs
php artisan generate:api_scaffold DataSource --fieldsFile=DataSource.json --datatables=true --prefix=admin --logs
php artisan generate:api_scaffold DataQuery --fieldsFile=DataQuery.json --datatables=true --prefix=admin --logs
php artisan generate:api_scaffold DataColumn --fieldsFile=DataColumn.json --datatables=true --prefix=admin --logs
For better user experience in form struture you can use
https://github.com/dandisy/elogui
or
https://github.com/dandisy/webcore-presentation
to overide Controllers and Views of Page and Datasource
4. Webcore with Content Personalization (BETA)
Webcore personalization system collect and use user behaviour when visiting webcore frontpage to personalize content,
to define content personalization, you must define pattern and implement the pattern to component or user persona
Run these command in your console
php artisan generate:api_scaffold Pattern --fieldsFile=Pattern.json --datatables=true --prefix=admin --logs
php artisan generate:api_scaffold PatternCard --fieldsFile=PatternCard.json --datatables=true --prefix=admin --logs
php artisan generate:api_scaffold Persona --fieldsFile=Persona.json --datatables=true --prefix=admin --logs
php artisan generate:api_scaffold Personalization --fieldsFile=Personalization.json --datatables=true --prefix=admin --logs
Dependencies
Dependencies
- dandisy/adminlte-templates based on infyomlabs/adminlte-templates
- dandisy/laravel-generator based on infyomlabs/laravel-generator
- dandisy/swagger-generator based on infyomlabs/swagger-generator
- dandisy/filemanager based on infinety-es/filemanager
- dandisy/webcore-page
- dandisy/webcore-menu
- arrilot/laravel-widgets
- barryvdh/laravel-debugbar
- league/glide-laravel
- santigarcor/laratrust
- harimayco/laravel-menu
- atayahmet/laravel-nestable
- ixudra/curl or guzzlehttp/guzzle
- barryvdh/laravel-dompdf or seguce92/laravel-dompdf
- phpoffice/phpspreadsheet or maatwebsite/excel
- pragmarx/tracker or jeremykenedy/laravel-logger
- spatie/laravel-activitylog
- fireguard/report or jimmyjs/laravel-report-generator
- khill/lavacharts or consoletvs/charts
If you activated laravel passport use :
- spatie/laravel-cors
What's Next?
At this point you have all that you need, you can browse the code base and build the rest of your application the way you normally would. Or you can visit the documentation to get a really good grasp on what's going on behind the scenes.